Ruby 抄书篇 - 用 Ruby 执行一个 huggingface diffusers 模型来生成图片
之前群里有人提起 Ruby 的 AI 生态,这个领域还是 py 的天地,就跟前端是 js 的天地一样。
但是有劳模Andrew Kane做了好多工作,各种常用库的封装,大模型的对接比如 huggingface 上 transformers 的调用informers,这产出着实让人赞叹。
实现的基本逻辑是使用onnxruntime这个通用大模型格式作为底层调用,上面封装调用。
对于有些没有 onnx 格式的(huggingface 上主要是 safetensors 格式较多),可以使用 optimum-cli 命令去一键转化格式。
想体验下用文本生成图片,py 只需要五行代码,用 Ruby 发现没有现成的封装,再看一下 huggingface diffuser 的结构 (model_index.json) 是几个模型 (tokenizer/embedding/unet/vae) 组合起来使用,需要多个模型前后组合起来调用。怎么办,咱抄书,以下是抄书内容非原创,原文在这里。
(插一段题外,遥记得十几前考 pmp 的时候,讲师建议没把握的可以把书抄一遍,当初就是手抄了一遍,笨办法也是办法。)
起步,先把大模型拿下来 (文档用的"CompVis/stable-diffusion-v1-4",这里用的"stable-diffusion-v1-5/stable-diffusion-v1-5")
optimum-cli export onnx --model stable-diffusion-v1-5/stable-diffusion-v1-5 onnx
准备,来一段文本,这个我会
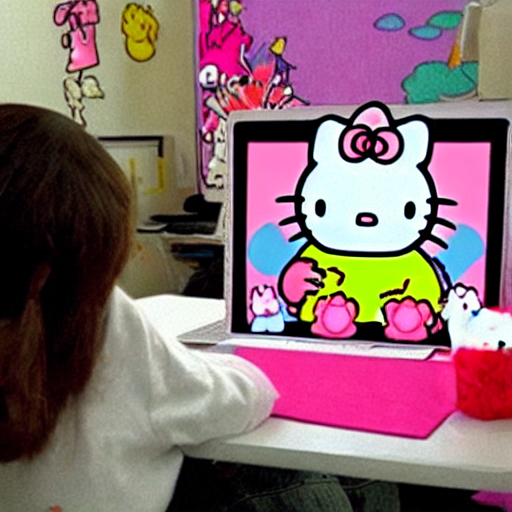
prompt = ["The godzilla is watching hello kitty doing her homework, they get along harmonious"]
Next,模型准备好备用
text_encoder = OnnxRuntime::Model.new("./onnx/text_encoder/model.onnx")
unet = OnnxRuntime::Model.new("./onnx/unet/model.onnx")
vae_decoder = OnnxRuntime::Model.new("./onnx/vae_decoder/model.onnx")
Next,把文本用 tokenizer 转换成 tokens
tokenizer = Tokenizers.from_pretrained("openai/clip-vit-large-patch14") # openai/clip-vit-base-patch32
tokenizer.enable_padding(length: 77, pad_id: 49407)
tokenizer.enable_truncation(77)
text_tokens = tokenizer.encode_batch(prompt)
text_ids = Torch.tensor(text_tokens.map(&:ids))
Next,把 tokens 做 embedding 生成模型输入需要的向量数据格式
text_embeddings = Torch.no_grad do
  text_encoder
    .predict({ input_ids: text_ids }) # Shape: 1x77
    .then { |h| Torch.tensor(h["last_hidden_state"]) } # Shape: 1x77x768
end
Next,按 diffusers 设计加入 padding 数据
uncond_tokens = tokenizer.encode_batch([""] * batch_size)
uncond_ids = Torch.tensor(uncond_tokens.map(&:ids))
uncond_embeddings = text_encoder
  .predict({ input_ids: uncond_ids })
  .then { |h| Torch.tensor(h["last_hidden_state"]) } # Shape: 1x77x768
text_embeddings = Torch.cat([uncond_embeddings, text_embeddings])
Next,创建 unet 模型生图用的初始 noise 数据
height = 512
width = 512
channels_num = unet.inputs.detect{ |e| e[:name] == "sample" }[:shape][1]
generator = Torch::Generator.new.manual_seed(0) # Seed generator to create the initial latent noise
Torch.manual_seed(0)
latents = Torch.randn([batch_size, channels_num, height / 8, width / 8], generator:, device: DEVICE) # Shape: 1x4x64x64
Next,unet 模型需要一个 scheduler 来进行一步步降噪并行成最终与 prompt 对应的图片。
scheduler 实现靠“大模型自举”就是让 gpt 生成结果失败,最后只能照着 diffusers源码手抄一份Ruby 版 PNDMScheduler。
scheduler = PNDMScheduler.new(steps_offset: 1, timestep_spacing: "leading")
latents = latents * scheduler.init_noise_sigma # Scaling the input with the initial noise distribution, sigma
num_inference_steps = 25 # denoising steps
scheduler.num_inference_steps = num_inference_steps
Next,主体部分,按 scheduler.timesteps 多次调用 unet 模型来 denoise 数据
guidance_scale = 7.5
scheduler.timesteps.each do |timestep|
  latent_model_input = Torch.cat([latents] * 2)
    .then { |input| scheduler.scale_model_input(input, timestep:) }

  noise_pred = Torch.no_grad do
    unet
      .predict({ sample: latent_model_input, timestep: Torch.tensor(timestep), encoder_hidden_states: text_embeddings })
      .then { |h| Torch.tensor(h["out_sample"]) } # Shape: 2x4x64x64
  end

  noise_pred_uncond, noise_pred_text = noise_pred.chunk(2)
  noise_pred = noise_pred_uncond + guidance_scale * (noise_pred_text - noise_pred_uncond)

  latents = scheduler.step(noise_pred, timestep, latents)[:prev_sample]
end
Next,数据生成好了,只需要调用 vae 把向量 decode 成 image 数据
latents = latents / 0.18215
image = Torch.no_grad do
  vae_decoder
    .predict({latent_sample: latents})
    .then { |h| Torch.tensor(h["sample"]) } # Shape: 1x3x512x512 这里可以看到转换成一张图片三个channel(RGB)及512像素
end
Final,保存图。
image = ((image / 2.0) + 0.5).clip(0, 1)
image = image[0] if image.ndim == 4
image = image.permute(1, 2, 0) # 调整维度顺序,从 (C, H, W) 到 (H, W, C)
image = (image * 255).round.to(Torch.uint8) # 转换到 uint8 并放大到 [0, 255]
output_height, output_width, _channels = image.shape
png = ChunkyPNG::Image.new(output_width, output_height)
height.times do |y|
  width.times do |x|
    r, g, b = image[y, x, 0..2].map(&:to_i) # 取 RGB 值
    png[x, y] = ChunkyPNG::Color.rgb(r, g, b)
  end
end
png.save("./output-rb.png")
在老旧笔记本上 (Linux Intel 9th i7,未使用 GPU) 同时执行 ruby 和 python 脚本的耗时
Ruby:
real 4m11.149s user 21m52.781s sys 0m8.744s
python:
real 4m18.794s user 23m1.629s sys 0m55.203s
其中时间有差异,应该是 onnx 自身优化的缘故,都是大模型的耗时,与调用语言关系不大。
结果

其它,
- 图像不好看,剩下就是模型调优和结构设计修改的事情,调用代码还是差不多的。只是如果替换或者修改了其中组件,一般就需要补上训练过程,因为预训练的 text2image 的权重参数对应关系已经不适用了。上面生成图片没有原始文档中生成的好看,大致是因为 tokenizer 不完全一致的缘故。
- 设置 seed 是为了生成相同的数据方便 debug(比如跟 python 数据 step by step 进行比对这种笨办法)
- cuda 本地安装编译支持 cpu 版本,不强制依赖 gpu 设备
- PNDMScheduler 只调试了当前 demo 执行到的部分,其余部分可能有 bug,DDIMScheduler 未使用和测试。
- 使用 GPU(cuda) 会快很多,几乎不用等,需要在各个 Torch.tensor(...) 加 to("cuda"),偷懒未做适配。