Rails Windows 10 使用 RubyMine + Vagrant VM
1、rubymine 安装略过,vagrant 安装略过,virtualbox 安装略过,Git 安装略过
2、Git\bin\bash.exe 设置为以管理员身份启动
3、使用管理员身份启动 rubymine
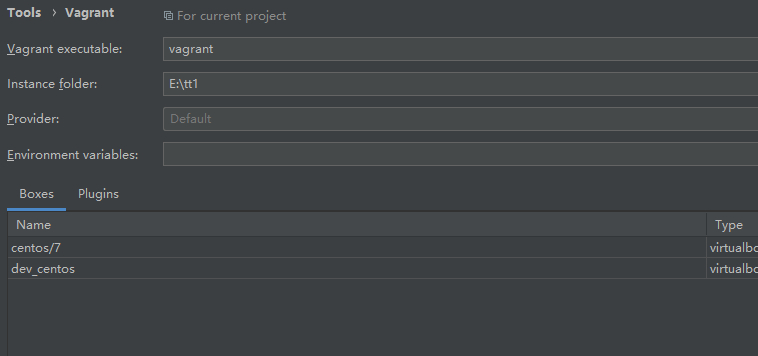
4、rubymine 设置中 vagrant 选项设置
5、rubymine 终端设置为 git bash

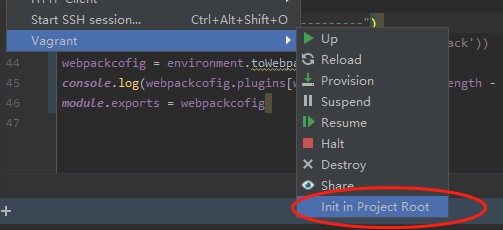
6、执行
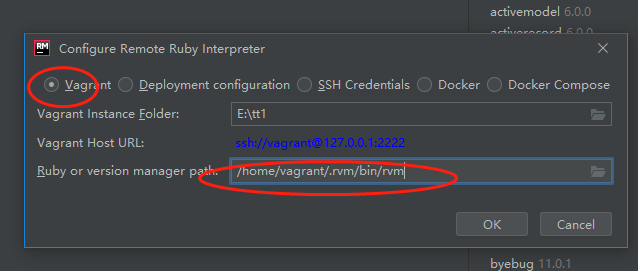
7、安装完 box 实例后,vagrant ssh 登录安装 ruby 环境,我使用的是 rvm
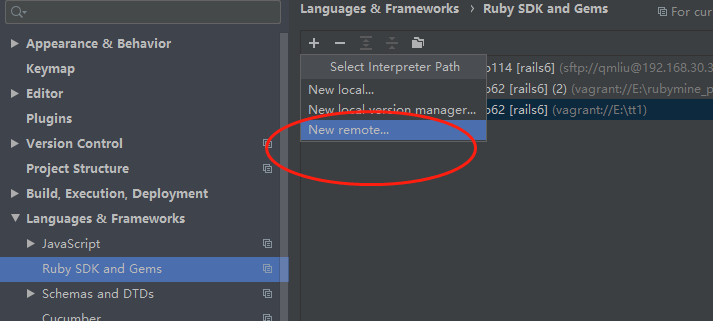
8、rubymine settings > Ruby SDK and Gems,设置好 ruby 和 gems
9、现在可以用 rubymine 来做项目了,各种命令都在 vm 环境中运行,文件编辑则在 rubymine 中,充分利用了 rubymine 的编辑优势,rails6 项目,起两个终端,分别启动 rails s 及 ./bin/webpack-dev-server 即可
#几个需注意问题:
1、vm 中无法在共享目录创建软链问题:启动 vagrant ssh 的终端需以管理员身份启动
2、rubymine 更改 erb, rb 文件刷新浏览器不体现更改问题,修改 webpacker.yml 文件,添加 watch_options
watch_options:
      aggregateTimeout: 300
      poll: 1000
      ignored: '**/node_modules/**'
3、使用 browser-sync-webpack-plugin 监听 erb, rb 文件自动刷新浏览器:
yarn add -dev browser-sync-webpack-plugin
在 webpack/development.js 中添加
 const BrowserSyncPlugin = require('browser-sync-webpack-plugin')

environment.plugins.append('BrowserSyncWebpack', new BrowserSyncPlugin(
    // BrowserSync options
    {
        // browse to http://localhost:3000/ during development
        host: '192.168.30.33',
        open: false,
        port: 3005,
        files: ['./app/views/**/*.erb','./public/**/*.html' ],
        watchOptions: {
            usePolling: true,
            interval: 300
        },


        // proxy the Webpack Dev Server endpoint
        // (which should be serving on http://localhost:3100/)
        // through BrowserSync
        proxy:'http://localhost:3000/',
    },
    // plugin options
    {
        // prevent BrowserSync from reloading the page
        // and let Webpack Dev Server take care of this
        reload: false
    }
))
3、使用 webpack-dev-server 时,文件变化的监听方式得更改为 ActiveSupport::FileUpdateChecker,在 development.rb 中
config.file_watcher = ActiveSupport::FileUpdateChecker